People often use email to exchange sensitive information, such as financial data, legal contracts, confidential product information, sales reports and projections, patient health information, or customer and employee information. As a result, mailboxes can become repositories for large amounts of potentially sensitive information and information leakage can become a serious threat to your organization.
-
· To help prevent information leakage, Exchange Online includes Information Rights Management (IRM) functionality that provides online and offline protection of email messages and attachments.
-
· IRM protection can be applied by users in Microsoft Outlook or Outlook Web App, and it can be applied by administrators using transport protection rules or Outlook protection rules.
-
· IRM helps you and your users control who can access, forward, print, or copy sensitive data within an email.
After it’s enabled, IRM protection can be applied to messages as follows:
-
· Users can manually apply a template using Outlook and Outlook Web App Users can apply an AD RMS rights policy template to an email message by selecting the template from the Set permissions list. When users send an IRM-protected message, any attached files that use a supported format also receive the same IRM protection as the message. IRM protection is applied to files associated with Word, Excel, and PowerPoint, as well as .xps files and attached email messages.
-
· Administrators can use transport protection rules to apply IRM protection automatically to both Outlook and Outlook Web App You can create transport protection rules to IRM-protect messages. Configure the transport protection rule action to apply an AD RMS rights policy template to messages that meet the rule condition. After you enable IRM, your organization’s AD RMS rights policy templates are available to use with the transport protection rule action called Apply rights protection to the message with.
-
· Administrators can create Outlook protection rules Outlook protection rules automatically apply IRM-protection to messages in Outlook 2010 (not Outlook Web App) based on message conditions that include the sender’s department, who the message is sent to, and whether recipients are inside or outside your organization.
Step 1: Use the Office 365 Admin Center to activate Azure Rights Management
By default, Azure Rights Management is disabled. To enable IRM features in Exchange Online, you need to activate it by using the Rights Management settings within the Office 365 administrative portal. For more information
1. sign in to Office 365 with your work or school account that is an administrator for your Office 365 deployment.
2. select the app launcher icon in the upper-left and choose Admin. The Admin tile appears only to Office 365 administrators.
3. In the left pane, expand SERVICE SETTINGS.
4. Click Rights Management.
5. On the RIGHTS MANAGEMENT page, click Manage.
6. On the rights management page, click activate.
7. When prompted Do you want to activate Rights Management?, click activate
You should now see Rights management is activated and the option to deactivate.
Step 2: Use the Shell to configure the RMS Online key sharing location in Exchange Online
Use the RMS key sharing URL corresponding to your location.
|
Location |
RMS key sharing location |
|
North America |
https://sp-rms.na.aadrm.com/TenantManagement/ServicePartner.svc |
|
European Union |
https://sp-rms.eu.aadrm.com/TenantManagement/ServicePartner.svc |
|
Asia |
https://sp-rms.ap.aadrm.com/TenantManagement/ServicePartner.svc |
|
South America |
https://sp-rms.sa.aadrm.com/TenantManagement/ServicePartner.svc |
|
Office 365 for Government (Government Community Cloud) |
https://sp-rms.govus.aadrm.com/TenantManagement/ServicePartner.svc 1 |
Connect to Exchange Online
1. $UserCredential = Get-Credential
2. $Session = New-PSSession -ConfigurationName Microsoft.Exchange -ConnectionUri https://outlook.office365.com/powershell-liveid/ -Credential $UserCredential -Authentication Basic –AllowRedirection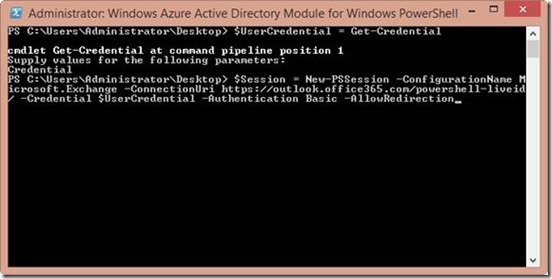
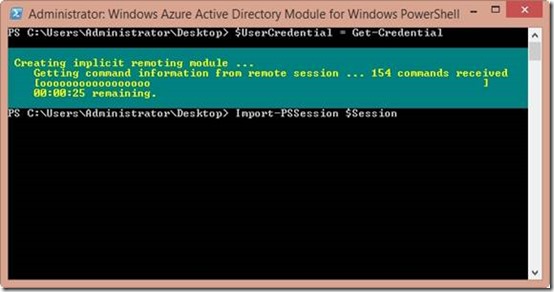
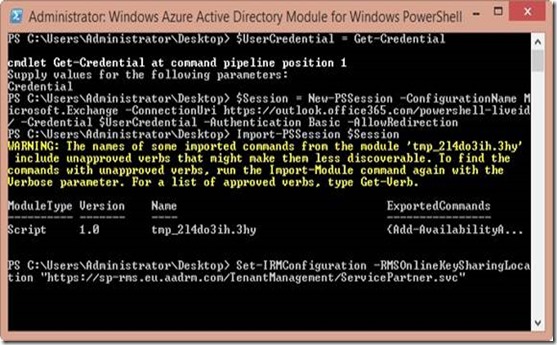
3. Import-PSSession $Session
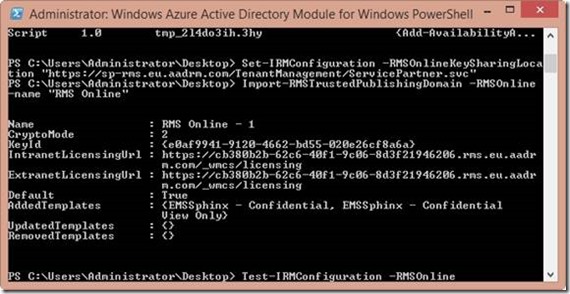
4. This command configures the RMS Online key sharing location in Exchange Online for a customer located in North America. Replace the RMS Online key sharing location with the correct URL for your location from the above table.
Set-IRMConfiguration –RMSOnlineKeySharingLocation “https://sp-rms.eu.aadrm.com/TenantManagement/ServicePartner.svc”
Step 3: Use the Shell to import the Trusted Publishing Domain (TPD) from RMS Online
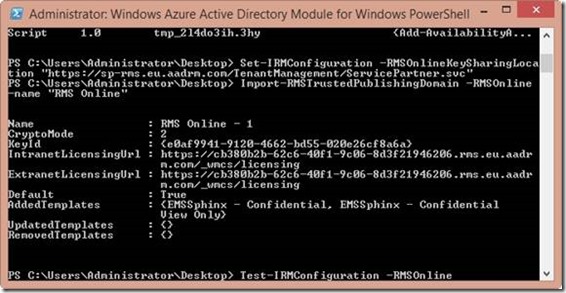
Run the following command to import the TPD from RMS Online.
Import-RMSTrustedPublishingDomain -RMSOnline -name “RMS Online”
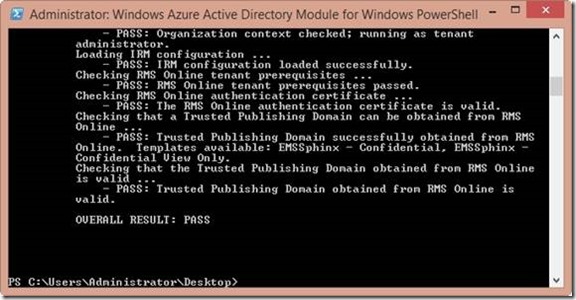
Test-IRMConfiguration -RMSOnline
Step 4: Use the Shell to enable IRM in Exchange Online
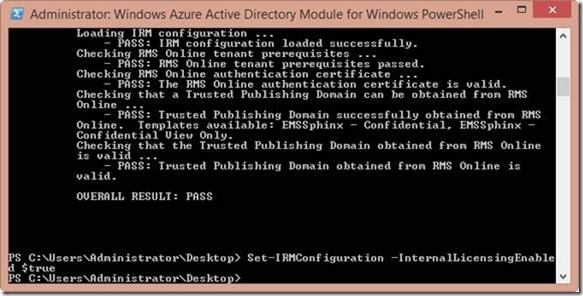
After you configure the RMS Online key sharing location in Exchange Online and import the RMS Online TPD, run the following command to enable IRM for your cloud-based email organization.
Set-IRMConfiguration -InternalLicensingEnabled $true
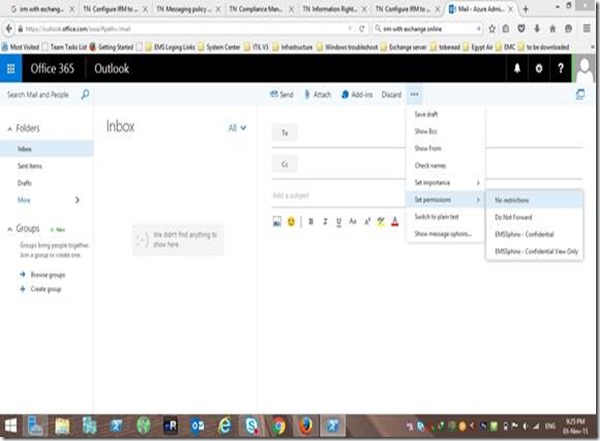
To verify that you have successfully imported the TPD and enabled IRM, do the following:
Compose a new message in Outlook Web App and IRM-protect it by selecting Set permissions from the extended menu (More Options Icon).
[…] https://maqov.wordpress.com/2015/11/09/how-to-send-protected-email-using-azure-rms-and-exchange-onli… […]
[…] How enable IRM with exchange online?, or How to send protected email?. […]